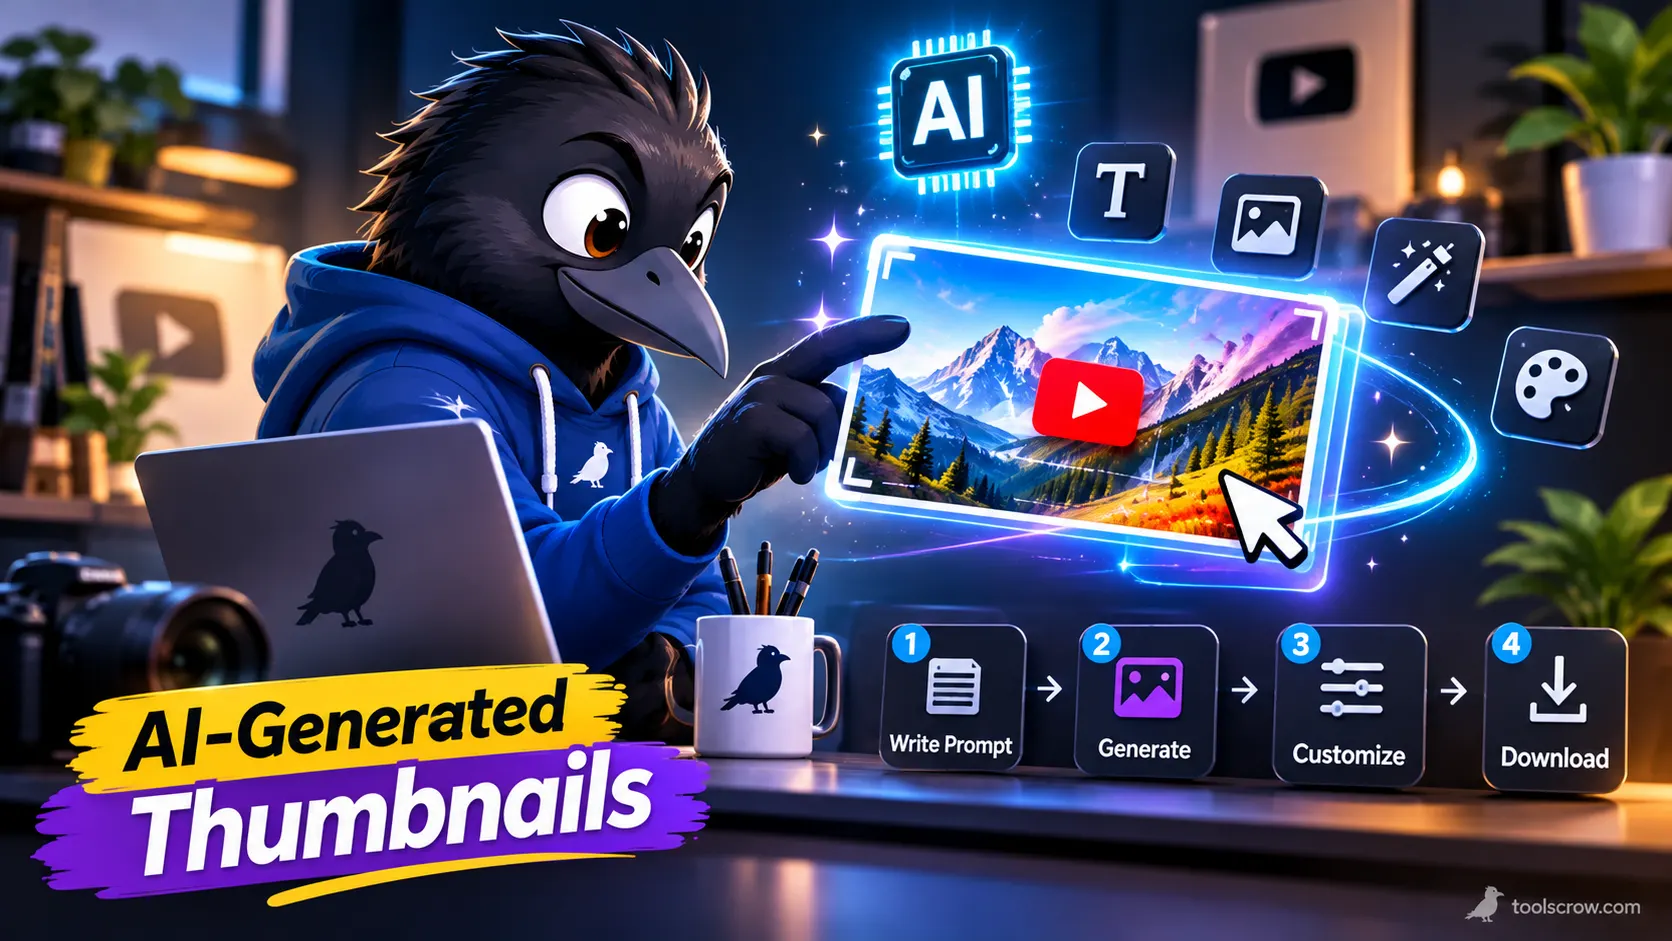
How to Create AI-Generated Thumbnails (Step-by-Step for Beginners)
A thumbnail is the small picture that decides whether anyone watches your video. You can spend weeks on the script, the filming and the editing, and then lose most of your audience at the last step because the picture looked dull, confusing or unreadable on a phone. For years, making a good one meant learning design software or paying someone who already knew it.
AI image generators have changed that. You can now describe a scene in a sentence and get a striking, professional-looking image in seconds, for free. But there is a catch that most guides skip: an AI image is not yet a thumbnail. It is raw material. It needs the right shape, a clear focal point, readable text, a check at phone size, and a final export that YouTube accepts. Beginners who skip those steps end up with beautiful pictures that do not get clicked.
This guide walks you through the whole process in order, with a working method for each step, copy-and-paste prompts, a checklist for spotting AI mistakes, and the rules you should know before you publish. It assumes you have never designed a thumbnail before.
A note on tools: ToolsCrow does not make AI images. This guide uses any AI image generator for the artwork, and free ToolsCrow browser tools to finish it: remove backgrounds, add text, preview it on YouTube-style layouts and export it. The ToolsCrow pages state that these tools run on your own device and do not upload your images. Details about outside services change often, so check their current terms before you rely on them.
The Short Answer: 8 Steps

- Plan the idea first. One message, one focal point, three to five words of text.
- Choose an AI image generator that fits your needs and read its terms.
- Write a thumbnail-ready prompt: subject, emotion, simple background, empty space for text, 16:9, no text in the image.
- Generate several versions and pick the clearest one, checking for AI glitches.
- Cut out and rebuild if you want a bolder subject on a new background.
- Add the text yourself with big, high-contrast lettering.
- Preview it in homepage, search and phone-sized layouts, then fix what you see.
- Export at 16:9, keep the file small, and upload.
What a Thumbnail Has to Do (and Why AI Alone Is Not Enough)
A thumbnail has three jobs, and they happen in about a second.
- Get noticed among a crowd of other videos.
- Make a promise about what the video offers, in a way a stranger understands instantly.
- Work together with the title so the two tell one story instead of repeating each other.
Remember that most of your viewers will see the thumbnail small. The ToolsCrow thumbnail preview tool even approximates a phone's suggested-videos list with thumbnails about 120 pixels wide. At that size, detail disappears. What remains is shapes, contrast, a face or object that is easy to recognize, and a few big words. AI generators are brilliant at detail, which is exactly what thumbnails do not need, so the work you do around the AI image matters more than the image itself.
For context, YouTube has said that half of all channels and videos have an impressions click-through rate between 2 and 10 percent, as reported by marketing sources. So do not judge yourself against a single magic number. The goal is steady improvement on your own channel.
Step 1: Plan the Idea Before You Open Any AI Tool
The most common beginner mistake is opening an AI tool and typing something exciting. Start with a one-minute brief instead. Answer these five questions in writing:
- What does the viewer get from this video? One sentence. For example: "How to save your first $1,000."
- What is the one thing the thumbnail will show? A single subject: an object, a person, a before-and-after. Not five.
- What emotion or curiosity should it trigger? Surprise, relief, excitement, a question the viewer wants answered.
- What three to five words will I add? Not a repeat of the title. Something that completes it. If the title is "I Tried Saving $1,000 in 30 Days," the thumbnail text might be "DAY 30 RESULT."
- Does it honestly match the video? If the thumbnail promises something the video does not deliver, you will lose viewers and may break YouTube's rules, as explained later.
If you have not finalized your title yet, do that now. The title and thumbnail work as a pair, and checking the title with the free YouTube Title Analyzer helps you decide what the picture should add.
Step 2: Choose an AI Image Generator
You do not need the "best" generator. You need one that suits your job and whose terms you are comfortable with. The market changes quickly, and free allowances differ between sources and change often, so this table describes strengths and not exact limits.
| If you need | Look for | Notes |
|---|---|---|
| The easiest start | A general assistant you already use, such as ChatGPT, Google Gemini or Microsoft Copilot | Free access is usually limited per day, and limits change. |
| Readable words inside the image | Ideogram is widely cited for text rendering, and Gemini is often placed close behind | Even so, adding text yourself gives you more control (see Step 6). |
| The clearest commercial licensing | Adobe Firefly is commonly recommended for commercially safe use | Free credits are limited, and plans change. |
| Artistic, stylized looks | Midjourney is widely cited for artistic quality | Generally paid. |
| Convenience inside a design app | Canva's built-in AI image tools | Reviewers describe the quality as lower than dedicated generators, but it is handy. |
| Unlimited, private experiments | Open models such as Stable Diffusion or FLUX run on your own computer | Needs a capable computer, and each model has its own license. |
Three Things to Check Before You Commit
- Commercial use. If your channel earns money, check whether images from the free plan may be used commercially. Reports about free-tier terms conflict between sources, so read the tool's own terms, and do not rely on a third-party summary.
- Watermarks. Some free plans add a visible mark to the image. A watermark on a thumbnail looks unprofessional, so check before you invest time.
- Aspect ratio control. Thumbnails are 16:9. Pick a tool that lets you request widescreen images, or plan to crop later.
Step 3: Write a Prompt That Actually Works for Thumbnails
A thumbnail prompt is different from an art prompt. You are not asking for the most beautiful image. You are asking for the clearest one, with room left for text. Use this six-part formula:
- Subject: what is the main thing? ("a laptop," "a hiker," "a jar of coins")
- Action or emotion: what is happening? ("excited," "glowing," "growing")
- Setting: keep it simple. ("on a clean desk," "blurred background")
- Style and lighting: ("bright natural light," "cinematic," "high contrast")
- Composition: where things go. ("subject on the right third, empty space on the left for text")
- Constraints: ("16:9 widescreen, no text, no logos, no watermarks")

Why You Should Ask for "No Text"
AI image generators have improved at lettering, but they still sometimes misspell words, invent letters or produce text that looks off. More importantly, text you add yourself is under your control. You choose the exact wording, font, color and position, and you can change it in seconds without regenerating the whole picture. So ask the AI for the artwork, and add the words afterward.
Why Simple Backgrounds Win
Busy backgrounds make small thumbnails messy. A plain, blurred or softly lit background makes the subject pop, leaves room for text, and, as you will see in Step 5, makes cutting the subject out much easier.
Iterate One Change at a Time
If the first result is close but not right, change one thing in the prompt and run it again: the lighting, the position, the color or the expression. Changing everything at once makes it impossible to learn what worked. Keep notes on the prompts that produce good results, because they become your reusable template.
Copy-and-Paste Prompt Library
Here are starting prompts for common channel types. Adjust the details to fit your video. None of them name real people, brands or characters, which keeps you clear of likeness and trademark problems.
| Channel type | Prompt to start from |
|---|---|
| Tech review | A modern laptop on a clean desk with a glowing screen, shallow depth of field, soft blue and orange lighting, laptop on the right third, empty space on the left, 16:9 widescreen, no text, no logos |
| Personal finance | A glass jar of coins with a small green plant growing from it on a wooden table, bright natural light, simple blurred background, jar on the left third, empty space on the right, 16:9 widescreen, no text |
| Cooking | Overhead shot of a bowl of fresh pasta with basil and tomatoes, steam rising, rustic wooden table, vibrant colors, empty space at the top and right, 16:9 widescreen, no text |
| Travel vlog | A lone hiker standing on a mountain ridge at golden hour, dramatic sky, wide cinematic composition, hiker on the left third, empty sky on the right, 16:9 widescreen, no text |
| Gaming or fantasy | A glowing sword stuck in a stone in a dark forest, magical blue light, high contrast, strong silhouette, centered subject, 16:9 widescreen, no text |
| Cutout subject (for Step 5) | A friendly cartoon robot waving, full body, centered, on a plain solid light-gray background, even lighting, no ground shadow, no text |
| Faceless explainer | A glowing question mark floating above a simple desk, dark background with a soft spotlight, bold shapes, high contrast, 16:9 widescreen, no text |
Step 4: Generate Several Versions, Choose One and Check for Glitches
Never settle for the first image. Generate four to eight versions and compare them at a small size, since that is how viewers will see them. Look for the one where the subject is clearest from far away.
The AI Glitch Checklist
Zoom in and check each finalist for the common mistakes AI makes:
- Hands and fingers: extra, missing or fused fingers.
- Eyes and teeth: mismatched eyes, odd pupils, too many teeth.
- Faces: a waxy or "too perfect" look that feels uncanny.
- Objects: warped screens, melting edges, impossible shapes.
- Text and symbols: invented lettering or fake logos on clothes and objects.
- Backgrounds: strange repeating patterns or distorted details at the edges.
- Consistency: shadows and lighting that do not agree with each other.
If the image has one small flaw, you can often crop it out or cover it with text. If it has several, regenerate.
Fix the Shape and Quality
If your image is not 16:9, you can crop it to the right ratio in the next steps. If it looks a little flat or dull, the Auto Image Enhancer can help brighten and sharpen it before you continue.
Step 5: Cut Out the Subject and Rebuild (Optional but Powerful)
Many of the most clickable thumbnails use a cut-out subject placed on a bold background. AI makes this easy, because you can generate the subject and the background separately.
How to Do It with the ToolsCrow Background Remover
- Generate your subject on a plain, solid background, as in the "cutout subject" prompt above.
- Open the Background Remover and choose the image.
- Press Remove background. If something is missed or left over, use the Box, Keep and Remove tools to correct it.
- Choose a new background: transparent, a solid color, or your own image, such as a second AI-generated background.
- Download. PNG keeps transparency, and the tool can export up to about 3200 pixels on the long side on a computer.
One honest note about how this tool works, so you know what to expect. The ToolsCrow Background Remover finds the subject by learning the background colors from the edges of your picture and following real edges. It does not use a neural-network model. That makes it fast, private and able to work offline, and it works best when the subject clearly differs from the background, such as an object on a plain or softly blurred backdrop. It struggles with very busy backgrounds or when the subject looks like its surroundings. That is exactly why you ask the AI for a plain background in Step 3.
Add the Classic Outline
A white or colored outline around the cut-out subject is a familiar thumbnail look that helps it stand out. ToolsCrow's Sticker Outline Maker is described as adding die-cut sticker-style borders to a cut-out image.
Step 6: Add Text That People Can Read in One Second
Text is what turns a nice picture into a thumbnail. Use the free Text Overlay Designer, which lets you add unlimited text layers, drag each into place, and set the font, size, color, rotation and effects. Everything runs in your browser.
The Rules for Thumbnail Text
- Three to five words at most. If you need more, the thumbnail is doing the title's job.
- Complete the title, never repeat it. The viewer already sees the title right next to the thumbnail.
- Make it big. As a starting point, the letters of your headline can be about one-sixth of the image height. On a 1280 by 720 picture, that is roughly 110 to 145 pixels. The tool measures font size in pixels of your original image, so scale up if your image is larger.
- Use a bold font. The tool offers Arial, Georgia, Times New Roman, Courier New, Impact, Verdana, Comic Sans and Script. Impact is a common choice for headlines because it is heavy and compact.
- Use the Outline style. The tool describes it as adding a black border around the letters, which helps on busy backgrounds. Add Shadow for depth, and Uppercase for punch.
- Contrast first. White or bright yellow on a dark area, dark text on a light area. If you cannot read it at a glance, change it.
- Keep it away from the bottom-right corner. YouTube places the duration badge there, and it will cover your text.
- Use two layers at most. A big main phrase and, if needed, one small supporting word. Duplicating a layer keeps the same style.
Color and Consistency
Pick two or three brand colors and reuse them. If you want to match a color from your logo or channel art, the Image Color Picker can give you the HEX and RGB values. Consistent colors and fonts make your videos recognizable in a feed, which helps returning viewers spot you quickly.
Think About Accessibility
A commonly cited figure is that roughly 1 in 12 men has some form of color vision deficiency. Do not rely on red-versus-green contrast to carry your message. Differences in brightness, a dark outline and plain shapes work for everyone.
Step 7: Preview It the Way Viewers Will See It, Then Fix It
This is the step that separates amateur thumbnails from effective ones, and it is the one beginners skip. A thumbnail that looks great full-screen on your monitor can fall apart at phone size.
Open the YouTube Thumbnail Preview tool and upload your design. It shows your thumbnail in three layouts: the homepage feed, search results and the suggested videos list on a watch page. Your thumbnail gets a red outline so you can find it, but that outline is only a testing aid and YouTube does not draw one.

What to Check
- Phone-size readability. Look at the suggested-videos layout, which approximates a phone with thumbnails about 120 pixels wide. Can you still read the words?
- The focal point. Is it obvious what the picture is about without reading anything?
- The corner badge. Turn on the duration badge and the HD badge. Is anything important hidden in the bottom-right corner?
- Standing out. Switch between the dark and light backgrounds. Does it look different from the neighbors, or does it blend in?
- The full card. Type in your real video title and channel name to see the whole card together. Do the title and thumbnail tell one story?
- The squint test. Squint at your screen, or step back. If you can still tell what the thumbnail is about, it is working.
Fix what you find: enlarge the text, increase contrast, simplify the background, or move the subject. Then preview again. Two or three rounds is normal.
Step 8: Export at the Right Size and Upload
The Specs
- Shape: 16:9.
- Safe size: 1280 by 720 pixels, with a minimum width of 640 pixels.
- Formats: JPG or PNG are the common choices. YouTube also lists static GIF.
- File size: this is where sources disagree, so be careful. The long-standing limit is 2 MB. Newer 2026 guidance says YouTube allows larger files, up to 50 MB, and bigger 4K-sized images when you upload from a computer, while uploads from the mobile app are still limited to 2 MB. Because guidance conflicts, confirm the current numbers in YouTube Help, and when in doubt, keep your file under 2 MB. It will work everywhere.
- Account: custom thumbnails require a verified YouTube account. If the option is missing, verify your phone number on the YouTube verification page.
How to Export
The ToolsCrow thumbnail preview tool has a Download 16:9 thumbnail button. You can choose PNG, JPG or WebP, and sizes including YouTube 1280 by 720, Full HD 1920 by 1080, and the 640 by 360 minimum. For most uploads, a 1280 by 720 JPG at the default quality is a safe choice. If the file is too large, run it through the Image Compressor, or resize it with the Image Resizer.
Upload and Test
In YouTube Studio, open your video's details and upload the custom thumbnail. The menu names can change over time, so look for the thumbnail section. YouTube also offers built-in thumbnail testing, often called Test and Compare, for eligible channels, which lets you try different designs and see which performs better. If you have access to it, use it. If you do not, you can still compare designs by trying one at a time and watching your click-through rate over a reasonable period.
Finally, give the video its best chance by pairing the thumbnail with a strong description. The free YouTube Description Generator helps you write one quickly.
Rules, Ethics and Copyright: What Beginners Should Know
This section is general information and not legal advice. Policies change, so check YouTube's current Help pages.
Do Not Mislead Viewers
YouTube's spam and deceptive practices rules include misleading metadata, which covers titles and thumbnails. A thumbnail should honestly represent what the video contains. Show a shocked face over something that never happens in the video, or a fake "official" look, and you will lose viewers and risk penalties. An AI image should make a real promise look better. It should never invent a promise.
Be Careful With Real People
Do not generate images of real people, such as celebrities, public figures or your competitors, to suggest they are in your video or endorse it. Sources note that YouTube enforcement on likeness is often driven by complaints, and that misleading thumbnails implying real people are featured can be a problem. Stick to your own face, people who have agreed, or clearly fictional subjects.
Avoid Trademarks and Characters
Do not ask the AI for branded characters, logos or copyrighted characters. Beyond the legal risk, AI versions of them tend to look wrong.
AI Disclosure on YouTube
YouTube requires creators to disclose realistic content that is altered or synthetic, using a setting in YouTube Studio. This is about the video itself, such as a realistic synthetic person or a made-up event that could be mistaken for real footage. Several sources say that a still image made with an AI image tool, used as a thumbnail, is not what triggers that requirement on its own, but the rules do evolve, so read the current disclosure guidance before you publish, especially if your video also contains realistic synthetic content.
Who Owns an AI-Generated Image?
This matters if your thumbnail style is part of your brand. In January 2025, the US Copyright Office concluded that prompts alone do not give a user enough control to be the author of AI output, and that purely AI-generated content is not eligible for copyright. It also said that human contributions, such as your own text, your own photos, significant modifications, and the creative selection and arrangement of elements, can be protected, though not the raw AI elements by themselves. Canada has not settled the question, and a registration that named an AI as a co-author has been challenged. The practical lesson is the same everywhere: do not count on owning the raw AI image, add your own human-made elements, and keep your originals and notes. Separately, your right to use an image commercially depends on the generator's own terms, so read them.
Protect Your Privacy
If your thumbnail includes a photo of you or your family, use tools that process images on your device. The ToolsCrow tools in this guide state that images never leave your device.
Beginner Mistakes That Hurt Clicks
Starting with the AI tool instead of the idea
Without a plan, you get a pretty picture that says nothing. Write the brief first.
Too much going on
One subject, one idea. If a friend cannot tell what it is in a second, simplify.
Tiny text
If you cannot read it in the phone-sized preview, it is too small.
Letting the AI write the words
Misspellings and odd letters can sink an otherwise good thumbnail. Add the text yourself.
Repeating the title
The title and thumbnail should complement each other, not echo each other.
Ignoring the corner
Anything in the bottom-right corner can be hidden by the duration badge.
Changing your style every video
A consistent look builds recognition. Reuse your colors, fonts and layout.
Clickbait that does not deliver
It may win a click, but it loses the viewer, and that hurts more than the click helped.
Not previewing
The monitor lies. Check at the sizes viewers actually see.
Troubleshooting
The AI keeps adding text or logos
Add "no text, no letters, no logos, no watermarks" to the end of your prompt, and shorten the rest. If it still happens, crop the area out or regenerate.
The subject cut-out has rough or missing edges
Use the Box tool to draw around the subject, and Keep and Remove strokes to fix the parts that were missed. Regenerate the subject on a plainer, higher-contrast background if needed.
The picture looks flat or dull
Try the Auto Image Enhancer, add a darker or more colorful background, or ask the AI for "high contrast, dramatic lighting."
The text is hard to read
Make it larger, turn on the Outline and Shadow styles, change the color for more contrast, or move it onto a calmer part of the picture.
The image is not 16:9
Export from the thumbnail preview tool using its 16:9 sizes, or regenerate with a widescreen request in your prompt.
The file is too large to upload
Export as JPG, reduce the size to 1280 by 720, and use the Image Compressor. Remember the 2 MB limit that applies to uploads from the mobile app.
The faces look fake
Use your own photo for faces if you can, and use AI for backgrounds and objects. A real face with real emotion often beats an uncanny one.
Frequently Asked Questions
Can I use AI-generated images for YouTube thumbnails?
Yes. YouTube does not ban AI-generated thumbnails, but they must not mislead viewers, must not impersonate real people, and must follow the generator's terms of use. Always check the current rules.
What is the best AI tool for YouTube thumbnails?
It depends on your needs. General assistants are the easiest to start with, some generators are known for text rendering, others for commercial licensing or artistic quality. Our advice is to use any good generator for the artwork and add the text yourself.
Do I have to disclose that my thumbnail is AI-generated?
YouTube's disclosure requirement is for realistic altered or synthetic content in the video. Sources generally say that an AI-made still image used as a thumbnail does not trigger it by itself, but rules change, so check YouTube's current guidance, especially if the video contains realistic synthetic content.
What size should a YouTube thumbnail be?
16:9, with 1280 by 720 pixels as the safe standard and a minimum width of 640 pixels. Newer guidance allows larger images from a computer, but 1280 by 720 works everywhere.
What is the maximum file size for a YouTube thumbnail?
Historically 2 MB. Newer guidance says up to 50 MB when uploading from a computer, while the mobile app remains at 2 MB. Sources conflict, so confirm in YouTube Help, and keep files under 2 MB to be safe.
How many words should be on a thumbnail?
Three to five at most. Fewer is usually better, and the words should complete the title, not repeat it.
Why does my thumbnail look different on my phone?
Because it is much smaller there. Use the suggested-videos layout in the preview tool, which approximates a phone, to check that text and subjects stay clear at small sizes.
Can I make a thumbnail for free?
Yes. Many AI generators have free tiers, and the ToolsCrow tools for cutouts, text, preview and export are free with no sign-up. Check the commercial-use terms of whichever generator you pick.
Can AI thumbnails get my video demonetized or my channel penalized?
The AI is not the problem. Misleading thumbnails, impersonation, policy-violating imagery and spammy repetition can all cause trouble, whether or not AI made the picture. Keep thumbnails honest and the images appropriate.
Can I use my own face with AI?
You can use your own photos in your thumbnails, and using a real photo of yourself often looks more authentic than an AI face. Cut yourself out with the Background Remover and place yourself on an AI-generated background.
How often should I change my thumbnail style?
Keep a consistent look across your videos, with the same colors, fonts and layout, and vary the picture itself. Test changes when a video underperforms, and use a testing feature if you have access to one.
Do thumbnails really make that much difference?
They are one of the biggest factors in whether people click. A better thumbnail on the same video can change how many people see it, which is why previewing and testing are worth the time.
The Bottom Line
You do not need design skills to make a good thumbnail. You need a clear idea, an AI image with a simple background and room for text, a few words that complete your title, and a check at phone size before you publish. The AI does the part that used to take hours. You do the part that makes it clickable: choosing the message, the focal point and the words.
Start with a five-line brief, generate a few images, pick the clearest, add three to five bold words and preview the result. Then export it, upload it and learn from the numbers. Open the free YouTube Thumbnail Preview to test your first design, add words with the Text Overlay Designer, and cut out subjects with the Background Remover. For more, browse the full set of ToolsCrow image tools.
Try YouTube Thumbnail Preview
Preview how your YouTube thumbnails will look on desktop and mobile. Optimize for click-through rates with safe zone gui
Open Tool
You Might Also Like
All posts →
Comments (1)
Great guide! One extra tip that works well for me: keep a folder of your best 3-4 AI prompts saved in a notes app. Once you find a background style that gets clicks, reuse it and just change the main subject. It saves so much time!
Leave a Comment
All comments are reviewed before publishing. Please keep it respectful and on-topic. Comments with links or promotional content will be rejected automatically.